Curtains and shades are beautiful additions to every home, enhancing its overall décor and style. Choose them right and you will instantly see your rooms transform into stylish gems adorning your home. Unlike what many may think, you don’t need to break the bank to make it work. With these DIY curtains and shades you are about to see here, you can get a custom look at bargain price! And, on top of that? You won’t have to make a single stitch!
Information provided by Prestige Decor
Prestige Decor has provided the below information in order to offer people an alternative to purchasing expensive window treatments.
1. Roman Shades with Tablecloth
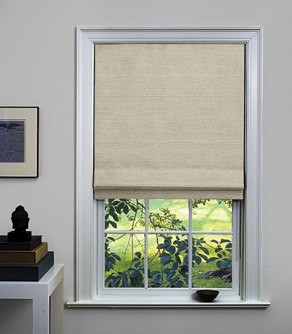 Maybe it’s the romance Roman shades exude that has earned them such popularity for so long. To make yours, look for a 60-inch (or so) rectangular or square tablecloth with something punchy, such as scallops, ruffles or tassels. That way, you won’t have to find a detail to add and sew it on. Cut it in half and use iron-on seam tape to hem the cut edges. Your shades are ready to hang (use drapery clips).
Variation:You can even make Romans with ribboned edges that fall into elegant pleats when the shade is raised. Just combine various colors and widths of ribbon and stretch the shade out on a flat surface. Once you have figured out the design, glue the ribbons around the outside edges. Make sure you do so one layer at a time and that the ribbons are longer than the width of the shade (about an inch will do) so that they can be folded over and glued to the back.
2. Doilies on Sheer Fabric
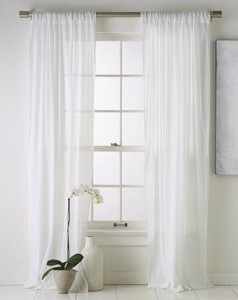 First, mix water with fabric dye until the result is what you want and then dip the doilies in the solution (you can use a plastic bucket). Remove them and let dry. Cut two panels of sheer fabric according to the dimensions of your window and hem the edges with adhesive tape (no sew). With a hot-glue gun, adhere the doilies to the panels and you are done.
Where you’ll have the doilies depends on your personal style. For example, you can adhere them along the edge for a more cropped look or even arrange them randomly and give a more playful flair. Finally, to give a romantic and elegant touch to your window treatment, you can glue a lace remnant to the bottom of your curtain, making sure you have at least an inch of extra space on each side to fold over and complete your masterpiece!
3. Stenciled Curtains
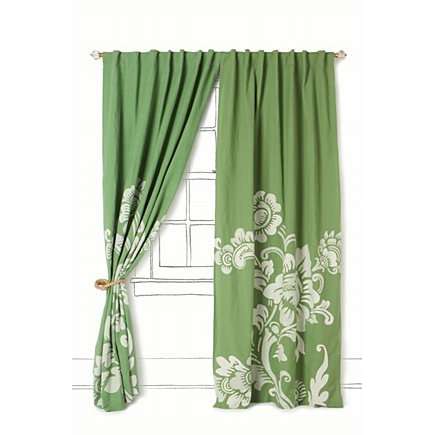 Having stenciled curtain panels is a fun way to dress up panels. You just lay the panels on a flat surface, place the stencil on each of them and paint on the design with fabric paint. To avoid having a mess, place kraft paper underneath the panels (it will help absorb any excess paint).
Variation:
You can print letters or images on ready-made fabric Roman shades, too. In other words, instead of using purchased stencil, you create your own! You just find the image you like on the Net and enlarge it on a photocopier. Put the patterns of choice under the curtain and trace them in pencil. Use a black fabric market to outline and shade as required. If you want to stencil a word and have it perfectly centered and spaced, start with the letter in the center of the word and add the next one to the right and the left. Do so until the world is complete.
4. Kitchen dishtowels!
 Besides drying the dishes, your dishtowels can also be used to create fun window treatments. Hang a kicky dishtowel from a cafe curtain rod after you have simply clipped drapery hooks to its top edge! It is a super-easy way to enhance a window and not worry about the cost of having the treatment changed if you get bored and want to change it!
Installing a Curtain Rod
Below are simple steps for installing any type of curtain rod:
You will need:
- tape measure
- screws
- drill
- 1/4” drill bit
- pencil
- standard curtain rod
Steps:
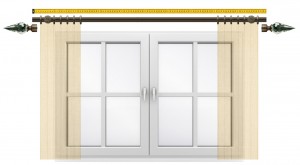
1. Determine how long your curtain rods will be – To do that, measure the interior width of your window and add four inches.
2. Decide where you will place the bracket – If, for example, you place the rod about an inch outside of the window on each side, you will get a balanced look (no gaps between the window and the curtain). Also, choosing to place the brackets a couple of inches above the window will make it look larger.
3. Mark the screw holes – Use a pencil and a level, mark the holes and pre-drill them for the screws with a 1/8 inch bit.
4. Drill the screws into the holes – Make sure you stop at about 1/4” away from the window frame, before you slide the bracket onto the screws.
5. Secure the bracket and place right-side bracket – Tighten the screws and then place the curtain rod into the bracket on the right side.
6. Place the left-side bracket to the frame – Use a level to align the brackets and mark the holes for the left-side bracket, too. Remove the rod and repeat steps 3-5.
7. Hang the curtains – Slide the panels onto the rod and hang the rod onto the brackets. Tight the set-screw on the back of the brackets to secure the rod.
If you are more of a visual type of person, this curtain installation video from Drapery Curtain Rods will help you install your curtain rods in minutes!
Undeniably, curtain rods add so much character to your window treatment and speak of your personal style. Drapery Curtain Rods website has a wide collection of curtain rods for every taste that you could also have a look at.
